Summarize
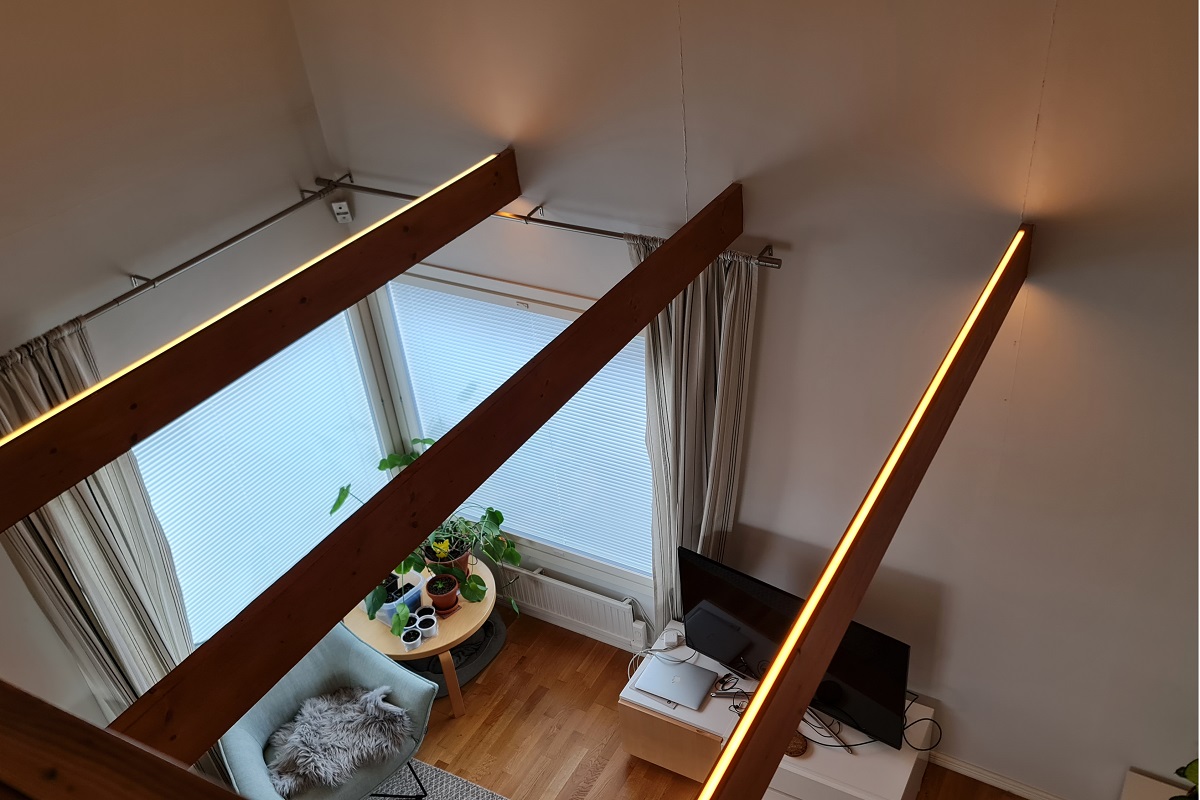
- Indirect and general lighting was implemented in the living room with LED strips
- A SOLO 14,4W LED strip with colour temperature control was used
- The installation included cutting and fixing the LED profiles
- Wireless Zigbee controller allows you to adjust the brightness and colour temperature of the light
- Customer satisfied with the end result, lighting atmospheric and practical
Indirect lighting in a high living room? You can do it. At the same time, general lighting was also installed in the living room. The lighting was made two-level by attaching LED light strips to the beams. Read here how the installation was done and see the pictures!
Easy indirect living room lighting with colour temperature adjustable LED strips
The LED strip used was a SOLO 14,4W high colour rendering index LED strip with adjustable colour temperature. The advantage of a colour temperature adjustable strip is that it always gives you the right colour temperature, depending on your mood.
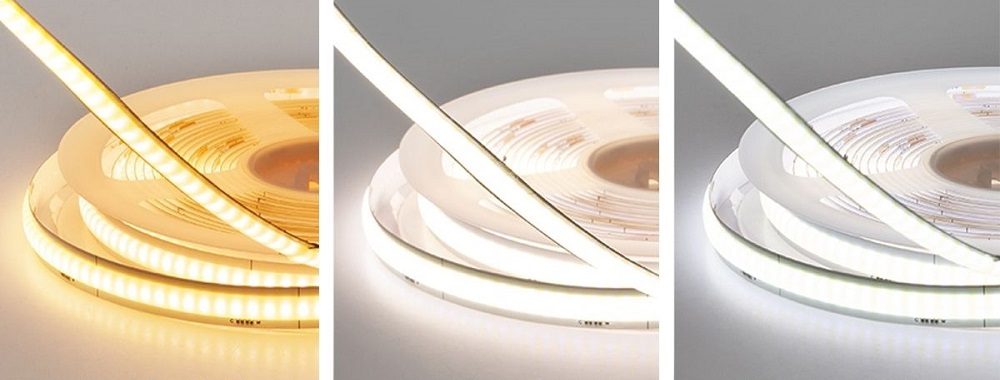
A metre of SOLO CCT 14,4 W/m LED strip gives approx. 500 lumens, so there’s plenty of light output for a high room, but fortunately it can also be dimmed to suit the mood. The lighting was installed in two different control groups.
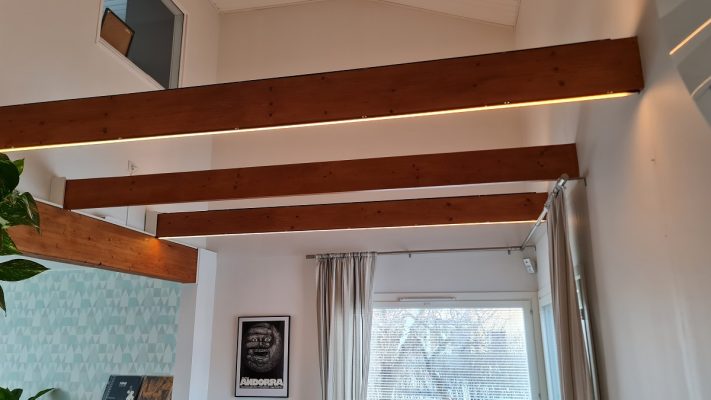
Overhead lighting: indirect lighting for the living room. The light is directed upwards towards the light ceiling and from there it descends through the reflectors.
Downlights: direct general lighting in the living room. Installed at a height of 260 cm, the LED profiles cast light at a 110-degree angle, effectively filling the living room with general lighting.
LED strip for the living room made at LedPaja or at home
For this project, LedPaja prepared everything as agreed, the steps were as follows.
- Led strip selection
- Driver and button selection (Zigbee)
- Checking the measurements
- Cutting profiles
- Cutting the led strip to the right length.
- Measuring the connecting wire to the driver and soldering it to the LED strip.
Since the LED profiles are 2.5 meters long and the beams are just over 3 meters, the LED profiles were made in two parts, and the LED strip came in lengths ready on a roll.
Moving to the installation site
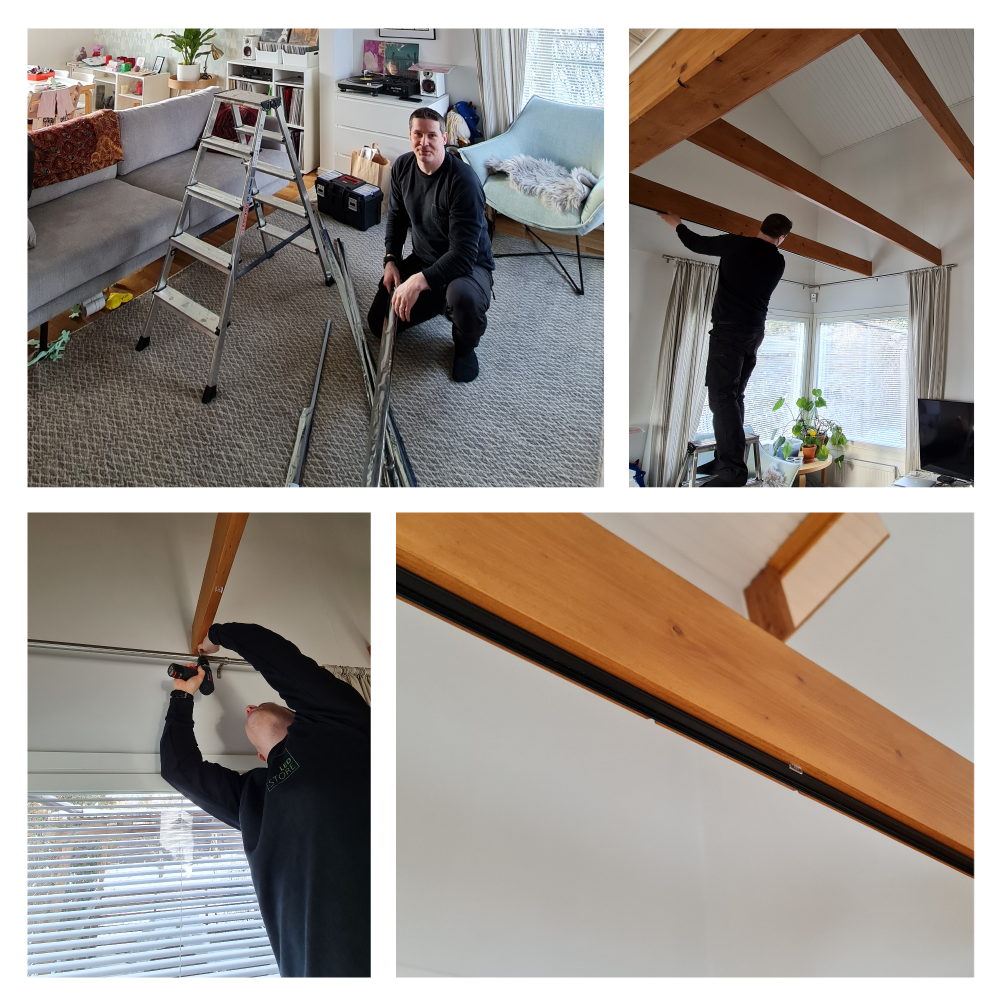
The installation took place in the living room and of course the first thing we did was spread out our stuff as if we were at home… Then the installation started. The installation proceeded as follows:
- Adjusting LED profile lengths to fit the installation site.
- Screwing the LED profile brackets in place approx. every 50cm.
- Pressing the profile into the brackets. Note that one bracket always goes to the extension to fix the parts together!
- Led strip light installation on led profile.
- Mounting the cover in place. Note that the seam of the cover comes at a different point than the seam of the profile, which reinforces the extension point!
- Running the wires of the LED strip light to the driver.
- Connecting the wires to the driver on the low-current and mains side.
- Wireless control pairing between the controller (Zigbee) and the driver.
Installation of aluminium profiles
Led SOLO CCT strip is 12mm wide, so a low profile with an inner groove of 12,5mm is perfect. The profile was chosen to be black. The beams were quite narrow, only 45mm wide, so the profiles were centred.
First, a visual check was made to ensure that the profiles were the right length and the point where the profile extension joined was marked. The brackets were screwed to the top and bottom of the beams. One bracket should always be placed at the joint to ensure that the profiles continue straight and neatly. The brackets were attached approx. every 50 cm. Then just the profiles were pressed into place “SNAP”.
Led strip lighting installation
Once all the LED profiles were in place, the installation of the LED strip lights began. The heat-adjustable SOLO tape has a heat-conducting double-sided tape ready for use. First, the debris was wiped off the bottom of the profile and then the LED strip lights were glued into the groove.
The LED strip was glued starting from the power supply end and then continued towards the other end. This is so that if for some reason the strip is too long, you can cut off the excess at the end.
Once the led strips were in place the covers were pressed into place. The insertion of the profile cover was started in reverse, first at the shorter end, using the cover of the full length profile (2.5 m). This ensured a sturdy and straight joint, preventing the aluminum splice and the cover seam from aligning.
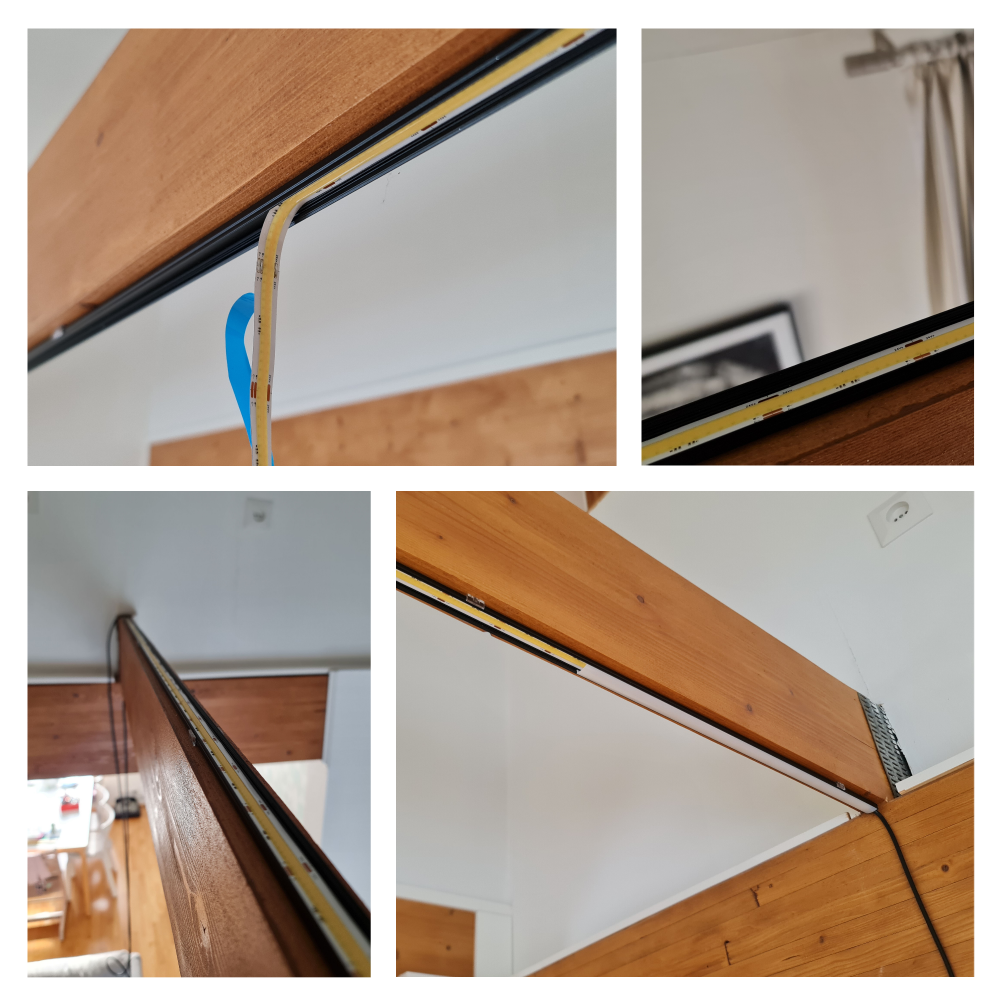
Temperature adjustable led strip needs a driver suitable for the type of strip
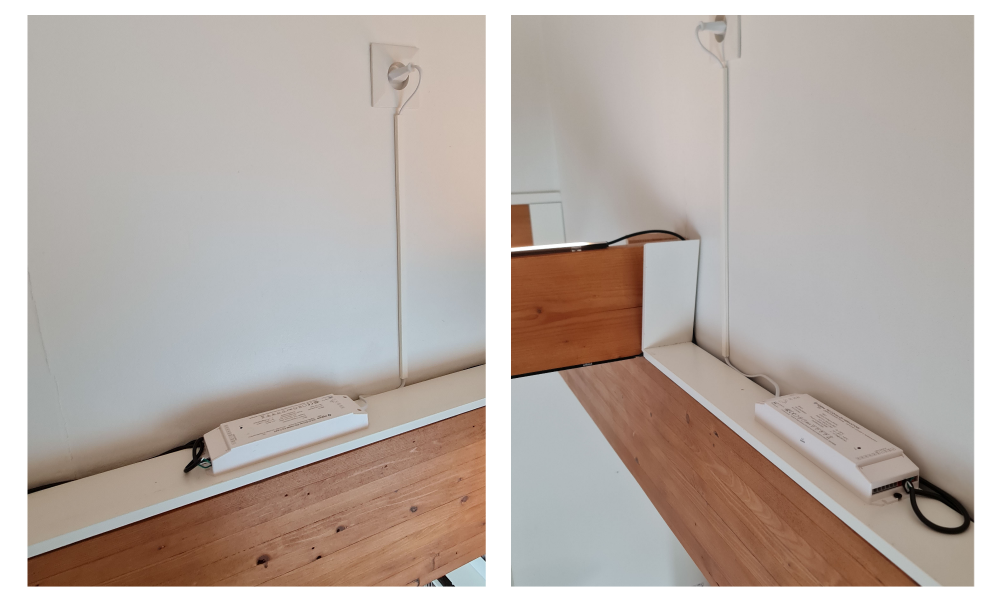
Once the LED strips were in place, the installation of the drivers began. Fortunately, at this location, electricity was easily accessible on the wall near the beams in the living room. The power is always on, but that’s a good thing with these Zigbee drivers, which are controlled by wireless radio buttons. From the driver to the strip is a three-pole low-current line (+ 24V, – CW, – WW), so not all drivers are suitable for CCT lights.
Three-core wires were run from the LED strips to the drivers, with the wires from two LED strips connected to each driver. The lower LED strips were connected to their own driver, and the upper ones to a separate driver. This allows the lights on the top and bottom of the beams to be used at different times. At the same time, we checked that the LED strips are working correctly and that the joints are in good condition. Sometimes during transport or installation, accidents happen and a wire gets torn off from the copper base of the LED strip.
Finally, the wires were cleaned up with a masking tape.
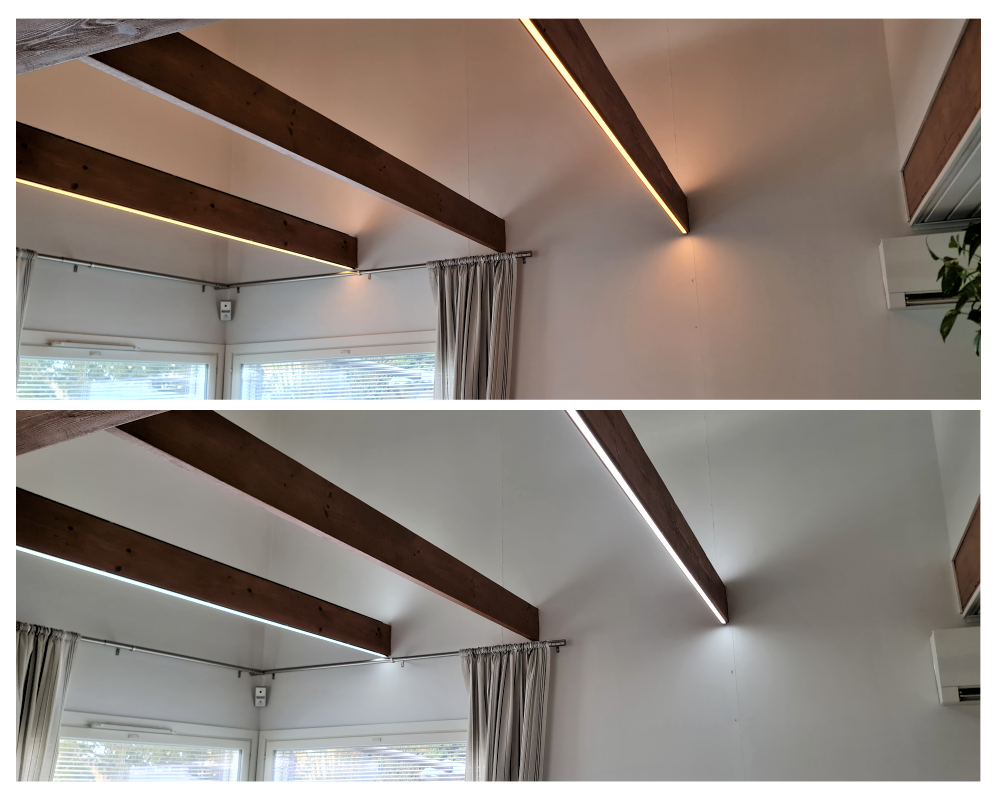
Create a cozy living room atmosphere with easy color temperature control
The brightness and colour temperature of the light can be easily adjusted to the desired Kelvin level using wireless controls. For example, warm dimmed light just to create a mood, or a slightly more neutral and brighter light for reading a book or socializing in the living room. The controller is a wireless Zigbee controller paired with a Zigbee receiver/driver.
The controller, a wall button, works on battery power and the signal is radio frequency from up to 20 metres away. Separate buttons were fitted for the top and bottom lights, and both were mounted in a Schneider EXXACT 2-piece frame set. Convenient and neat. The buttons are also available in black. The button acts as an easy control and has two memory slots for easy storage and use of your favourite settings. Just hold the button down and save the adjustments. One press brings up the saved situation.
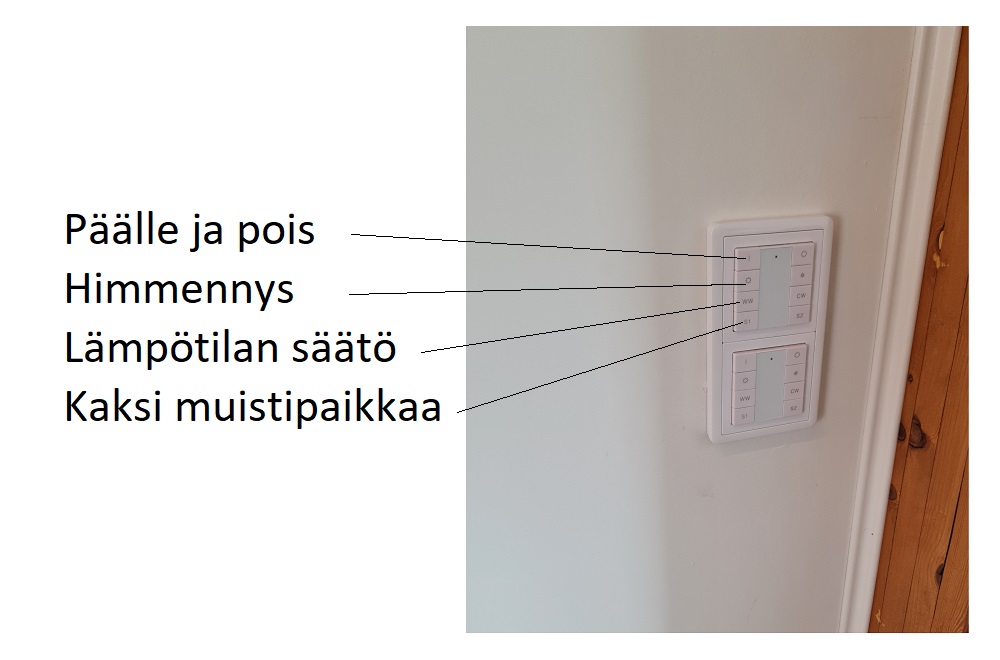
If you want to time and program the light to behave according to sunlight, for example, you also need a Zigbee bridge or hub, such as Philips Hue, Samsung Smart Things, Azoula, Tuya or Homey. That is, any Zigbee 3.0 bridge.
Indirect lighting in the living room – the end result was pleasing
The customer was very satisfied with the result. The lighting in the living room underwent a complete makeover, becoming atmospheric yet practical, serving all occasions.
When sizing the drivers, allowance was made in case additional lights would later be added to the middle beam. However, based on current use, the two LED strips downwards and two upwards have proven sufficient.
Amount of light in the living room
For a living room, 150-200 lux is usually enough for general lighting, but for reading, +500 lux should be enough to avoid eye fatigue. In this case, the light came to the sofa below approx. 250 Lux and it was perceived as a huge improvement on the old. The amount of light is sufficient for normal living, and the kitchen provides additional lighting for the space. And of course, options remain, as lights can still be added later to the middle beam if needed.
Indirect lighting in the living room can never be the only source of light, as the lighting should consist of three layers. Indirect, general and task light. All complement each other. So, in this solution, indirect lighting was provided in the living room (upwards) and general lighting (downwards).
Other destinations
Not everyone has beams in the ceiling, of course, but you can also get indirect light into your living room with wall profiles. Indirect light to the ceiling with a retrofit profile can also be achieved at the edge of the ceiling or lower down on the wall (light in two directions).
You can also add recessed elements to the ceiling, creating a highly graphic look and added elegance, as in this apartment renovation.
Led lighting expert
LedStore has been an expert in LED lighting since 2010. We have our own product design, so our products are technologically state-of-the-art.
We focus on light colour temperature controlled and high colour rendering index lights. We do around 500 lighting designs in a year.
We offer a service of custom-made led strips, i.e. made-to-order, easy to install led strips in profiles for everyone. Also installed.
Remember that we are always ready to offer our help to you along the way, by email (myynti@ledstore.fi) and by phone (045 251 4510). Feel free to share photos of your own projects on social media using #ledstorefi on Instagram and ledstorefinland on Facebook. We love to see the cool things done by our LEDs, and it also helps to provide inspiration for those who are not sure about the power and awesomeness of LEDs. Did you know that we already have over 3 500 pictures of our LED installations in our Gallery!
Gallery of Led lights:
Product gallery: Pictures of PRODUCTS in different installation locations
Indirect light: Indirect light in different spaces
Room-specific: Light in different rooms
References: Complete houses that have been photographed

